Got all the parts out to the farm.
Started reassembling, just like at Justin's.
That's the stash of bean poles in the background.
Along the way I made great use of my "Yankee Screwdriver." This fine device will drive screws with relative ease, and uses no electricity. You may have seen a device like this in some Mission Impossible movie where they bust into an elevator control box.
I do have a battery powered cordless drill out there, but with one battery and some distance to a charger, I use it with prudence.
Walls are up
Roof almost done
Hey it's a coop! Could use a little paint though...
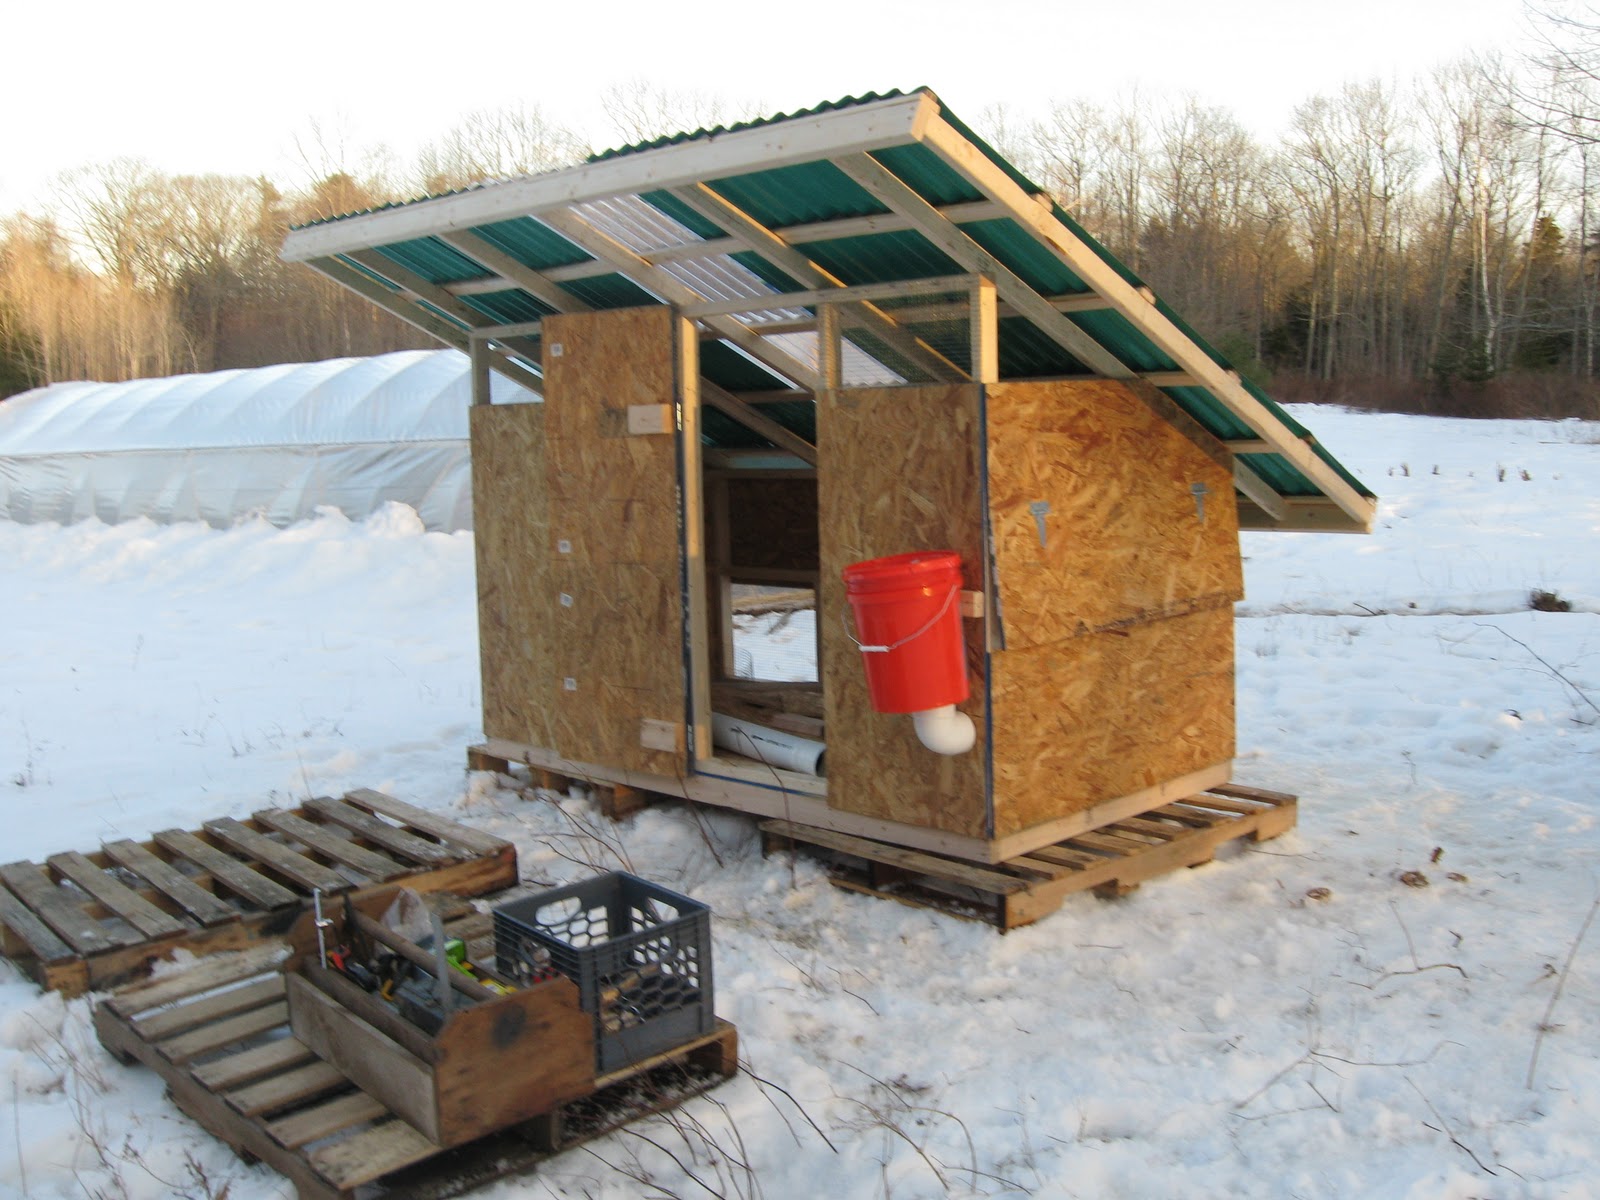
And the back side. With skylight for human and chicken utility. The whole roof is a bit big. It keeps the coop walls less exposed to the elements, but it also provides more shelter around the coop when the chickens are foraging.
This coop is based on one I designed for my previous flock. There is a wide vent along the low back wall, and then vents high on the front wall. The warm air rises, and exits the upper vent, fresh cool air comes in the lower vent. When it's cold outside, I close the lower vent. Humid air can still rise out the top (preventing frostbite on combs) but there is less airflow so the chickens can stay warmer.
The skylight works great to illuminate the inside of the coop for me and for the chickens. They key in on light levels to lay eggs, so I don't want to keep them in a dark box. When the sun is up, they're up!


No comments:
Post a Comment